XD1000 , XD1000 DELTA , XD1000 VIETNAM , XD1000 DELTA VIETNAM , XD1000 PITESCO , XD1000 PITESCO VIETNAM , XD1000 DELTA PITESCO VIETNAM
Stereoscopic Width Gauge for cold rolling mills
DigiScan XD1000
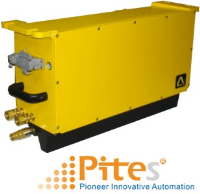
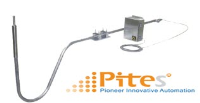
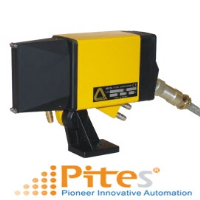
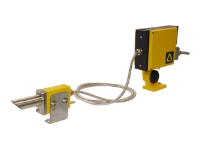
The Stereoscopic Width Gauge DigiScan XD1000, designed for installation above the mill roll tables in cold rolling mills, is state-of-the-art technology for measuring the width of strip or plate.
The stereoscopic arrangement permits high on-line accuracy despite material hop, tilt, lateral movement, and thickness variation.
Main features
- Two digital CCD cameras with 4096 pixels each
 and high-quality multi-lens optics, mounted on a precision optical bed in stereoscopic vision;
 - Advanced edge detection software and data capture processor to perform edge sensing in real-time;
- 40 MHz High Speed digital camera;
- High speed CPU executing digital filtering algorithms to determine edges location with sub-pixel accuracy and to calculate product width;
- Simplicity of installation and maintenance;
- Very quick change of sensor head;
- Compact, sealed die-cast aluminium housing;
- Modular architecture allowing easy extension and implementation of effective solutions with end users;
- Laser line pointer for easy commissioning
Operating principle
|
The core of the DigiScan XD1000 consists of proprietary software operating on a high performance frame grabber and two 4096 pixel CCD (Charge Coupled Device) high performance digital cameras. DELTA Stereoscopic Width Gauge employs an advanced digital edge detection process that captures the digitized camera data. Software routines running on the high speed embedded processor perform sub-pixel edge determination in two dimensional space. The camera data is filtered using a high-speed Infinite Impulse Response (IIR) digital filter. Sub-pixel edge locations are then determined based on the second derivative of the pixel data. With two sub-pixel edges from each camera, the true width of the material is calculated using geometric triangulation. These trigonometric functions allow very accurate width measurement in spite of the influences of material pass line variations, thickness variations and flutter. |
 |
Connectivity
The DigiScan XD1000 with built in Ethernet connection, integrated digital and analogue I/Os has a very flexible communication architecture and can easily be connected into any automation system.
Ethernet connection permits communication with level 2 for exchange of product identification and measurement data.
I/Os (and optional Profibus DP) permit connection to level 1.
The DigiScan has in standard 2 analogue outputs which can be configured (normally set for indication of the width and centreline) and 6 digital I/Os.
Software
|
The DigiScan XD1000 is delivered with a PC software (Windows XP). The communication is established through Ethernet TCP/IP protocol.
|
 |
The diagnostic function includes: analysis of the actual strip position in space and edge locations, graphical analysis of raw camera line scan data, log functions. The data can be stored and replayed at a later time for analysis.
Calibration
Two-dimensional calibration is performed prior to delivery on a precisely positioned calibration fixture at several discrete reference heights. Calibration is accomplished by collecting camera pixel data at these reference heights and then generating coefficients that map the pixel locations to spatial locations at any height within the calibrated range. A successful calibration will therefore normalize for any lens distortion effects and establish the system triangulation compensation to any pass line and material thickness variations.
The width gauge is delivered calibrated in our factory. The installation position is not critical as the stereoscopic cameras will compensate for any variation in the distance between the strip and the gauge.
The DigiScan XD1000 is supplied with a certified mask with several slots simulating different strip widths and a verification software.


 Mr. Trí