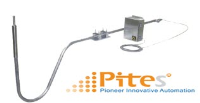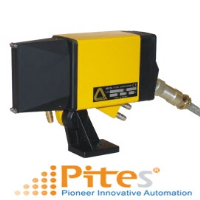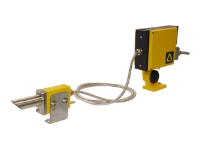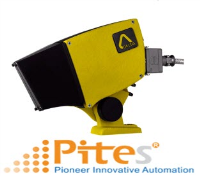
XD4000 , XD4000 DELTA , XD4000 VIETNAM ,XD4000 DELTA VIETNAM
Stereoscopic Width Gauge for strip/plate products
DigiScan XD4000
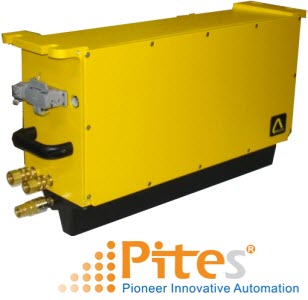
The Stereoscopic Width Gauge DigiScan XD4000, designed for installation above the mill roll tables in hot strip and plate mills and cold rolling mills, is state-of-the-art technology for measuring the width of strip / plate products. For use at the roughing mill or finishing mill exit, the self-emitted optical radiation of the hot strip provides sufficient contrast for width determination. An optional backlight mode is available for installation at the entry to the coilers or when the rolling temperatures are below 600°C.
Main features
- Two digital CCD cameras with 4096 pixels each and high-quality multi-lens optics, mounted on a precision optical bed in stereoscopic vision;
- Advanced edge detection software and data capture processor to perform edge sensing in real-time at 2000 Hertz;
- 40MHz High Speed digital camera;
- High speed CPU executing digital filtering algorithms to determine edges location with sub-pixel accuracy and to calculate product width;
- Simplicity of installation and maintenance;
- Very quick change of sensor head;
- Compact water cooled sealed die-cast aluminium housing;
- Modular architecture allowing easy extension and implementation of effective solutions with end users;
- Client Server architecture with multiple displays on a network;
- Remote dial up Access Service through network for trouble shooting;
- Laser line pointer for easy commissioning;
- Self emitted or back light mode;
- Optional features include - Thermal profile for self emitted Gauges;
Operating principle
The core of the DigiScan XD4000 consists of proprietary software operating on a high performance frame grabber and two 4096 pixel CCD (Charge Coupled Device) high performance digital cameras.
DELTA Stereoscopic Width Gauge employs an advanced digital edge detection process that captures the digitized camera data. Software routines running on the high speed embedded processor perform sub-pixel edge determination in two dimensional space.
The camera data are filtered using a high-speed Infinite Impulse Response (IIR) digital filter. Sub-pixel edge locations are then determined based on the second derivative of the pixel data. With two sub-pixel edges from each camera, the true width of the material is calculated using geometric triangulation. These trigonometric functions allow very accurate width measurement in spite of the influences of material pass line variations, thickness variations and flutter.
 |
 |
System description

The DigiScan Width Gauge sensor captures all the edge data and computes width and centreline. This information along with other I/O and alarm data is passed on to a number of computers through an Ethernet communication channel. A Windows based workstation computer acquires the width measurements and centre line deviations from the DigiScan sensor, using TCP/IP high speed link.
The Gauge Processor supports multiple workstation clients on a network. DELTA client software is supported by all industry standard Windows operating systems (Windows XP). The workstations provide a colour graphic display suitable for use by the maintenance engineers and also drive other remote displays in the operator's pulpit. The display shows the coil number and statistical product width data, as well as a graph of product width deviation and centreline deviation versus time. This Gauge also offers remote dial up access for troubleshooting of the Gauge.
The DigiScan Width Gauge includes configurable analogue outputs for deviation from the reference width, centreline deviation, or actual edge locations. Digital outputs provide Gauge status information.
Client Workstation - Operators interface
The client workstations consist of a computer with Windows XP, running software with a Windows graphical user interface (GUI). The client workstation interfaces to the Gauge on a network. In addition to the primary graphics displays depicting product width data, the workstation can also display information that aids in performing Gauge diagnostic and maintenance functions.
The workstation main screen features a real-time display of product statistical information and a graph of width and centreline deviation versus the full strip time for the mill operator. Optionally, the workstation display can be customized to suit the needs of the mill.
Since this Gauge is truly a networked Gauge there may be many different client workstations such as a manager's office etc. customized to each user. The core information is available on the network and maybe displayed in different formats at different workstations at the same time.
Standard displayed information includes:
- Coil identification number
- Reference width
- Average strip width
- Minimum strip width
- Maximum strip width
- +/- Deviation from the reference width
- Date and time
- A graphic display of strip width and centreline deviation versus time or length
All measurement data can be recorded on the hard drive of the workstations and replayed at a later time for analysis.
The standard DigiScan software includes the ability to make a hard copy of the main graphics screen display at the touch of a button.
Other modes of operation support analysis of the actual strip position in space and edge locations, configuration of the Gauge, cameras, and workstation, standardization of the Gauge, and graphical analysis of raw camera line scan data. Various software tools are provided to aid in Gauge set up and maintenance.
 |
 |
Temperature profile (Optional feature)
The thermal profile display is very useful to mill operators in diagnosing problems with camber as usually it results from one of three sources. Off level rolling in the roughing mill will create a cambered transfer bar. Alternately, if the furnace door is not sealing properly, it will cause one edge of the slab to be colder than the other edge. This will definitely cause the bar to camber and will lead to problems in rolling. As the operator tries to correct against the camber he will create a wedge shaped profile which causes further quality problems in subsequent operations and cold rolling mills. A third source of problems come from non-uniform descale spray water in various stands of the mill. Any problems with broken or plugged spray nozzles will create uneven temperature across the width of the strip.
This thermal profile option is a very useful tool in helping to isolate the source of camber, hook and also skid marks from reheating furnaces.
This Thermal profile displays the overview of temperature distribution of the strip for better control of the rolling process. The temperature at the centre of the bar is determined by a pyrometer; the temperatures at locations away from the centre are determined by comparing the emission intensity at the point with the emission intensity at the centre.
Host communication
The DigiScan Width Gauge supports TCP / IP over Ethernet to the host computer with industry standard Microsoft Windows network protocols. Modbus TCP/IP is the standard protocol for level 2 connection. Optionally, DELTA could also custom design a host interface.
The host computer transmits coil identification number and target width associated with the strip to be measured, and may transmit the aim temperature, temperature conversion curve number or factor and estimated strip length (if required). The width Gauge will respond with an acknowledge and, once the strip has been completely measured, the Gauge can respond to a host request for width statistics, including the measured average, minimum, maximum, and standard deviation of width. In addition, the Gauge will transmit the current system status and alarm conditions when requested by the host or at pre-programmed times identified by the user.
Calibration
Two-dimensional calibration is performed prior to delivery on a precisely positioned calibration fixture at several discrete reference heights. Calibration is accomplished by collecting camera pixel data at these reference heights and then generating coefficients that map the pixel locations to spatial locations at any height within the calibrated range.
A successful calibration will therefore:
- Normalize for any lens distortion effects.
- Establish the system triangulation compensation to any pass line and material thickness variations.
DigiScan XD4000 Width Gauge is supplied with a verification - standardization fixture.
The verification software captures 1000 samples of width data - in a Verify mode and shows the statistics of all readings. When such a test is completed the results are saved to a file and printed.
Standardization is used to compensate for small misalignments in the camera enclosure in the as-installed configuration during initial Gauge installation and, later, to compensate for potential shifts in the alignment of the camera enclosure supporting structure. The standardization fixture mounts on the roll table and is aligned within the view of the Gauge cameras, using the optical bed alignment laser.


 Mr. Trí